Instructors
Our instructors are the cream of the crop in the Twin Cities voice over world, including agency owners, all of the voice acting instructors at the Guthrie, top agents, top talent, directors, and more.
In fact, we work with every recognized voice over talent agency in the Twin Cites! These are the places that represent you and get you work after you finish training.
Cost and Length
While our competition charges $1,400 for two hours/week for five weeks in a small group, our School of Voiceover training is just $599 with our current Voice Acting Expo deal for the same thing.
Both get you trained live on mic in person by a professional coach and engineer every week. But School of Voiceover training also includes two additional in-person 90-minute workshops and a 30-minute followup coaching call (that's eight sessions, total) to make sure you're completely ready to take the next step toward paying work, additional coaches some weeks, and it’s over $850 less!
► NEW: 4-part Home Study course now included with your tuition!
We keep the cost down by having our own Studio and Training Center (directions) so that you can use that extra $850 toward a demo (which we can get you inexpensively) or more advanced training. In fact, more than one our students have gotten an agent and paying work after just one training series!
Training and cost options
Take as little or as much training as you want depending on your needs & budget: Don't commit 1-2 thousand dollars up front like other training programs.
Classes fill quickly. How to contact us:
| We will only contact you regarding class schedules or referral payments |
Other questions? Call me, Sarah Larson, at 612-836-8869.
New to voice acting?
Don't yet have a demo or working experience? Start with semi-private coaching in the Essentials of Voiceover class, which meets weekly for 5 weeks with 1-2 coaches each week.
Each week, you get professional 1-on-1 coaching on-mic and audio of all your sessions to study and keep permanently. You also receive a workbook on industry fundamentals and additional training on everything you need to get into the voiceover industry including copy interpretation, voice skills, studio etiquette, home studio, making your first demo, and much, much more. You also get special discounts to any Voice Acting Expo.
Regular price of this class is $1100, but with our current Voice Acting Expo discount of over $550, you can join now for only $599.
| Sarah is extremely knowledgeable on all aspects of the industry, very insightful and provides wonderful feedback. The class was small enough to keep it very personal but large enough I learned a lot from seeing others get instruction. –Heidi Busch, Essentials of VO graduate |
Are You a Working Voiceover
Talent or want to be?
Do you already have a demo and several jobs under your belt? Do you want to work towards having a professional demo? Audition for our Professional Development series under the direction of one or more of our 25+ top-flight coaches, all top pros themselves, many with decades in the business.
This is the most intensive training, giving you ten private and semi-private coaching sessions in all with multiple coaches. You receive one-on-one coaching both in person over four multi-hour sessions in small groups of 3-5 students, and over the phone in five fully private coaching sessions.
Regular price of this advanced class is $1100, but with the current Voice Acting Expo special, you pay only $599.
| "Lots of time on mic, supportive environment, small class size, incredible coaches...and after taking several classes I have an agent and am working!" –Student Michael White |
Click here for detailed info about Professional Development.
Both Professional Development and Accelerated Essentials of Voiceover Plus class sizes are kept small so you get LOTS of time on mic and personal attention to your needs and skills. Besides learning how to perform, you'll learn how to work from home, and how to break into this country’s fourth-largest voiceover market: the Twin Cities.
Class schedule & locations
Schedules flex to fit your needs. Click here to quickly let me know your preferences. We can also work with you to get you make up sessions when you know in advance you will need to miss a session or two.
LOCATIONS: Classes are taught at the School of Voice Over in St. Louis Park just southwest of 100 and 394 (map and directions). The address is 5821 Cedar Lake Rd South, St. Louis Park, MN 55416, in the Sunset Ridge Office Center. (Use the East entrance of the 5821 building.)
SCHEDULE: 3-10 classes are scheduled each month at times depending on the preference of students on our waiting lists.
Weekday evenings, weekend days and mornings and Saturday mornings and afternoons are all available. Click here to let me know when you would like to take classes.
About Level 1: Accelerated Essentials of Voice Over
The Twin Cities is one of the top voiceover markets in the world. In the U.S., only New York, L. A. and Chicago are bigger, and the Twin Cities has the most high-paying non-union work of any of them —you're already where you need to be to succeed!
| I've never done voiceover so I had no idea what the class would be like. It's fun! Sarah is a great teacher. It's a safe environment to practice and you get to witness others perform which provides many learning opportunities. –Doug Harris, Voiceover Essentials of Voiceover graduate |
Some of what you will learn in this class:
- How to read advertising copy and industrial scripts on mic. We have scripts to find exactly what will maximize your strengths and growth, and you will learn to find scripts that match your abilities.
- How to create a demo, and how to market yourself.
- Vocal tricks to get advertisers to hire you.
- How to minimize vocal tics and mouth noises.
- How to get the most out of ad copy without sounding sales-y or announcerish.
- To be the talent that gets hired.
- Studio etiquette, protocol, and decorum.
- All the weird things said by copy writers, producers, and directors say to talent in the booth: what they mean when they use industry lingo. (You will be difficult to work with if you don't know the lingo, in spite of talent and great attitude.)
- You'll receive tons of useful information in your weekly handouts.
- What you'll need to create a professional demo.
ANSWERS TO COMMON QUESTIONS ABOUT
Level 1–Accelerated Essentials:
- Classes are 2 hours or longer, so you get a lot of mic time and individual attention, and the benefit of cross-stimulation from your fellow students.
- All students will receive their class recordings at no additional charge for you to study and track your progress.
- Classes are at our Training Center near 100 and 395 (map and directions)
- Class size is limited to 5.
- This is not a beginners class, although beginners may join. It's a high-level class recommended for everyone who isn't already working in the VO business. Even those who have taken classes elsewhere often find that they didn't receive the kinds of nuts-and-bolts training they need to compete in the Voiceover business.
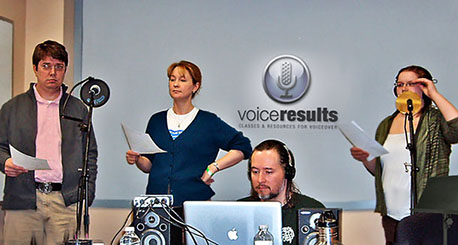
Voiceover students being coached on a group spot in class
More About Advanced VO Training
Standard class size is 3 people (limit of 5) and move quickly. You work with multiple instructors to maximize your voice strengths and refine your skills.Pre-requisite: Accelerated Essentials of Voice Over, or Audition
| "I learned more than I expected to! Very helpful critiques. I grew as a voiceover talent, and as a person—I have more confidence now. I learned a lot by paying attention to others' feedback too. You really do learn more in a group." –Student Katie Horvat |
You will get hours of in-person instruction. Get all the details here.
Some of the great coaches who have worked one-on-with our students include:
 |
|
Sarah Jones-LarsonFounder of School of Voiceover / Voice Results, Sarah has coached hundreds of students over the past two decades, and has performed hundreds of VO spots as a working talent herself. |
Gary GroomesGary is a longtime stage, film and voice actor. He once did a single-line VO spot that paid him $25,000/year for many years. |
||
John WehrmanJohn is the "Baritone-Next-Door,” a longtime and very experienced voice over talent. Moore Talent represents him for voice and on-camera. |
||
Ross YoungRoss is a Twin Cities director, actor and voiceover artist with extensive stage, on-camera, improvisation and voice over experience. |
||
Nancy CrockerNancy has worked extensively, appearing in five independent films, dozens of plays, countless radio and TV commercials, and corporate films. |
||
Jim SchnobrichJim is a top pro at the Audio Ruckus studio with 10+ years of experience producing, directing and engineering voiceover. |
||
Dave LarsonDave is an actor and VO talent who coaches VO, acting, improv and stand-up, and makes his living as a coach, talent, speaker and consultant. |
||
Meet Some of Your Engineers: |
||
Phil EnsmingerPhil has worked in and out of a dozen Minneapolis/St. Paul studios recording and editing the voices of hundreds of talented people. |
||
Jake LongworthA regular session engineer at the 2015 Voice Acting Expo and for Essentials of Voiceover students at the School of Voiceover. |
||
You can take this class repeatedly because our instructors will always
challenge you at your level to expand your skills, and it's a lot of fun! Call me, Sarah Larson, at 612-836-8869 so I can answer any questions you may have or visit our professional development page for more info.
Get Free Training: Get Funding
Some companies and government job training programs offer a budget or funding for job training. We have had students funded both through government and corporate funding programs. Usually all that is needed is to download and print the School of Voiceover / Voice Results brochure, provide it to your representative and follow their directions on procedures for getting funding for your training.
To get work, the first step after professional training is to get a samples of your voice that you can post online and send to agents, producers, casting directors, and clients.
Probably the most important purpose of a having work samples is to be able to work online. Read Commercial Demos, the Rules for more information.
How do you REALLY succeed?
Be ready to win an audition with an agent. If you can't win an audition with an agent, you shouldn't be doing a demo. Sometimes we say "Don't do a demo until you absolutely have to!" Plenty of people get an agent BEFORE they even do a demo. You need to get very well trained before you even consider doing a demo. And practice, and get critiqued by someone who is currently working in your geographical area.
I've got students who've gone on to do national spots, so you can do it too! But remember, it can take a while to break in. Will you get work even before finishing class? Will you be asked to sign with an agency within weeks of finishing class? Both have happened to my students this year! But realistically, you probably won't get booked on day 1. And even when you do get booked, it will be awhile before people start booking you again and again. So be patient until the phone starts ringing.
Also: Be great to work with. When I made $10,000 doing a half dozen spots for Great Clips it was great. But having Old Home dairy pay me several hundred dollars a month for five years as they reused my spots over and over again was even better. You want that repeat business. And if you get in an agency, you want them to re-up your contract year after year. So always be really, really great to work with.
About Sarah:
Sarah Jones-Larson�is�in her fourth decade as a voiceover professional. Her voiceover students have been successful getting local, regional, and national VO work.
Her voice has been heard on hundreds of radio and television commercials locally and nationwide and in hundreds of training, medical, and technical DVD's, IVR, and on the web.
A voiceover instructor at The Academy of Film and Television for four years, as a faculty member at the University of Minnesota, Sarah was rated above the 99th percentile as an instructor by the University of Minnesota Office of Measurement Services. Some of Sarah's clients include:

Listen to Demos: Commercial · Narrative · IVR
About Funding and Referrals:
You are paid cash for ALL referrals once you are a student (or you can choose to electronic payment or course credit). If you are not a student, you earn cash for your first payment, and course credit for additional referrals. (Once you become a student all future payments are your choice of cash, electronic payment or course credit.)
Other questions? Call me, Sarah Larson, at 612-605-8843.
What about getting an agent?
We'll help you get ready, but when the time comes, click any logo below to learn how to apply to be represented by the top voiceover agencies in the Twin Cities:
How to apply to Moore Creative Talent, Inc.
How to apply to Wehmann Models & Talent Inc.
How to apply to the Meredith Agency
Pro Mics and other
equipment at great prices:
You don't need to record from home to get work. But if you want to set up a home studio, don't buy a too-cheap mic! Large diaphragm condenser mics can be a good place to start. For recording software, start with Audacity (and during or after installation add these extra libraries to Audacity). But: do NOT download from sourceforge. Use the link above instead (CNET). Note: a home recording studio is often referred to as a digital audio workstation (DAW).
A clothes closet will often work as a location, but if not, check out our do-it-yourself room corner $80 home studio that sets up in just 90 minutes!
If you're interested in setting up your DAW, here are some under-$300 mics we recommend, some under $100, and below that some recommended equipment. These are all cardiod-pattern directional large diaphragm capsule condenser microphones (excepting the Heil). "Large" tends to mean having an at least 1-inch diameter diaphragm.
These mics require more power than what are called "USB mics" and so you will also need a USB mixer. The mixer provides the power (called "phantom power") and connects the microphone to your computer. In other words, it sits in between the microphone and your computer. An XLR cable connects the microphone to the mixer, and a USB cable connects the mixer to your computer. The mixer will also have it's own power cable that plugs into any wall outlet. So you generally can NOT simply use an XLR-to-USB adapter, unless it provides 48V phantom power for condenser microphones. And such adapters are generally as expensive as mixers, so you're better off simply buying a mixer.
USB mixers: All these mics need power (known as phantom power) provided from a mixer or adapter. Adapters tend to be more unreliable than mixers, not that much cheaper, and have less functionality than mixers. So we recommend using a mixer for the added functionality and reliability. Note that mixers that provide less than 48v phantom power will almost always work, and will not harm, microphones that list 48v as their needed spec. Read about why that is, and how phantom power works here.
The NW02-1A Mixer ($47.99 on Amazon and reviewed here) has full 48v phantom power on TWO XLR channels so not only can you record multi-person spots, but if a channel or knob goes bad ever after some years, you have a backup channel and don't need to buy a new mixer.
The Weymic Professional Mixer | 4-Channel 2-Bus Mixer with USB Input 48V Phantom Powerr (under $50) is a great choice. or the Focusrite iTrack Solo, which will work from iPad/Mac/PC ($75) or the Behringer Xenyx Q502USB with on-board compression ($55). If your mixer has on-board compression, remember to turn it off when testing your setup! (Only the Q502USB listed above has on-board compression.)
An FET condenser mic (also sometimes called capacitor mic) with good transformer coupled FET (solid state) circuitry can be as warm sounding as any tube condenser mic. (Note also that you need to warm up a tube mic for up to an hour before it will produce consistent sound). Most mics here are FET with capacitor-based elements for warmer, brighter and bigger sound than electret-based elements.
Condenser microphones are incredibly sensitive to any sound imaginable, and you don't need all that sensitivity to sound terrific. Any number closer to zero than -43dB-A or so is generally fine (mics below range from -40/okay to -31/very sensitivity). The closer to zero, the more sensitive the mic is. If sensitivity is closer to zero than -32 (-31,-30,-29 etc) or so, some talent may have great difficulty keeping mouth sounds and small studio noises to an acceptable minimum. For example, one of our talent using a -30.45 Sterling ST69 has trouble with normally unnoticeable mouth noise. (Go here to learn what you can do about mouth noise or try this product.)
The first step to choosing a mic is to first search for it at SweetWater, MusiciansFriend and Amazon and read the reviews of people who have bought one.
Got more to spend? Here is a review of terrific VO mics from $899 and up. Want the portability of a USB mic? Try the Shure PG42 USB ($230) or MXL USB 009 ($230) but first listen here (#10 and #4 on list) to how much better these sound than most USB mics (USB mics review #1 • review #2).
Or, want an incredible microphone for voiceover at the lowest imaginable price? Modify an existing mic you already own. Read how DIYers "clone" much more expensive mics here.
Recommended mics
in
rough order of preference:
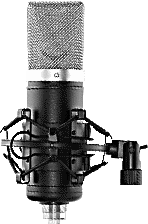 |
MP-47 ($699)This is a mic that compares to $3000+ mics (listen to audio comparison), like the Neumann 47fet. This is a very sensitive mic (near -30.4dB), so you'll need good studio acoustics, and low mouth noise (this product helps), but its ultra-low self-noise of <10dB won't cause any problems. How is a mic like this possible at such a low cost? It's parts were chosen and planned by some of the world's most advanced audio gurus (like Jim Williams) after over ten years of research, and based on parts designed for $3000+ microphones. |
|
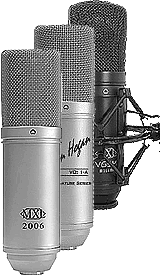
MXL 2006($99.97 on Amazon • read the manual)From Marshall Electronics, the company that builds many popular mics for other companies, this is a mic designed for voiceover—it sounds awesome: deep tones without heaviness and a silky, never harsh top end. Marshall also makes the VO:1-A Harlan Hogan Voiceover Microphone (pictured middle, specs). Listen to amazing audio comparisons of it with more expensive mics. The 1-A's published frequency-response graph, polar pattern, Max SPL, sensitivity, noise, body and grille, etc. is identical to the 2006. (Sample VO:1-A review: "A personality…flattering on voiceover tracks" –Radio and Production, 2010) 2006 includes shock mount and rugged, deluxe carrying case. VO:1-A and 2006 specs: 16dB noise • -35dB sensitivity • 2006 Specs. Note: The V63M (black, back) and 2006 differ only in the shape of the body and headbasket; internally, they share the same circuit and capsule diaphragm. The V63M is widely relabeled (OEM'd) by organizations such as Guitar Center, Musician’s Friend, Music 123 and others. See the V63M for $100 • 20dB noise • |
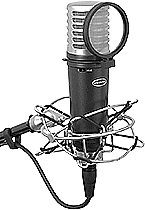 |
Samson MTR201 ($150 or compare prices)"This microphone sounds really, really good." –Ask Audio Mag Review Great mic, bargain price. Sensitive, with lower self-noise than many more expensive mics. Comes with solid case, external shock mount and pop filter as shown. In many ways, a bargain knock-off of features found in much more expensive voiceover mics. How to connect the shock mount. 13dB noise • -33dB sensitivity • Specs. |
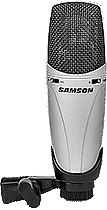 |
Samson CL7 ($100 or compare prices)A great bargain with a 1.1-inch diaphragm in the capsule —bigger than most others listed here. A great sounding mic for voiceover at an incredible price. Internally shock-mounted capsule, but external shock mount (+$30) is a separate option. Or, get MTR201 (above) for just $20 more than CL7+shock mount 17dB noise • -40dB sensitivity • Specs. |
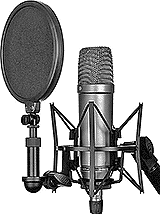 |
Rode NT1-A ($219 package or compare prices)The sensitive Rode NT1A has ultra-low self noise which allows capturing the quietest whisper with exceptional detail. A long-popular mic with voice actors, this is great for audio books and where detail to articulation is required, but not for very sibilant or talent with heavy mouth noise. 5dB noise • -32dB sensitivity • Specs. |
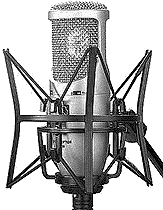 |
AKG P420 ($179 or compare prices)The AKG P420 (Perception 420 is the older version) gives you high sensitivity and multiple pickup patterns. Includes a spider-style shock mount and aluminum carrying case. Traditionally popular for its transparent yet very warm sound up close—a great voiceover sound. 15dB noise • -31dB sensitivity • Specs. |
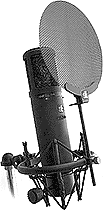 |
sE Electronics sE2200a II C ($299 or compare prices)The sE2200a II C gives you stunning quality and up-front sound that made the original version such a huge hit. Very versatile,with a highpass filter and 10dB pad for advanced sound-shaping options and low self-noise and high SPL handling provides you with an extended dynamic range. 13.9dB noise • -32dB sensitivity • Specs. |
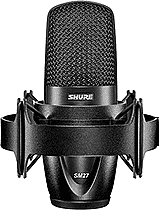 |
Shure SM27 ($299 or compare prices)A rugged, low self-noise mic with three separate mesh layers to reduce wind and breath noise as well as EMI/RFI. Essentially a flat mic until the crucial "airy" frequencies, where there is a bump for increased clarity. 9.5dB noise • -37dB sensitivity • Specs. |
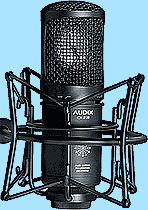 |
Audix CX112B ($299 or compare prices)Warm in the depths and clear and shimmering in the treble. The mic has a switchable low-pass filter, and is supplied in a foam-lined wooden box, no shock mount included. Review. 15dB noise • -35dB sensitivity • Specs. |
 |
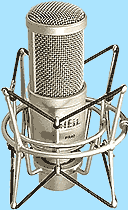
ADK A6 (Review • Priced as low as $170)A smooth neutral tone many find works well on spoken voice (neutral sound coloration; subjectively accurate sound but warm) and a little, but not a lot, of upper mids for added presence. Has very little proximity effect (not much added bass when close up) so you can get really close if you want to, without any boominess or "flabby bottom.". 15dB noise • 37.7dB sensitivity • Spec sheet. |
 |
Heil Sound PR 30 ($250 or compare prices)"…competitive with dynamic microphones costing far more" –MIX, 2007 Many users say it sounds like a condenser mic. Some feel its smooth, wide frequency range sounds like a ribbon mic. But actually? It's a completely new approach to dynamic microphone technology that's great for voice.. Specs |
Note: Some mic sensitivity specs converted via this online tool
from mV/Pa to dB re 1 V/Pa. In listed specs,
"noise" means self-noise, and dB means dB re 1 V/Pa.
For both noise and sensitivity, numbers closer to zero are better.
Other equipment:
Metal punched air diverters (like this Dragonpad—$11) don't affect high frequencies, and single-paned mesh filters don't affect HF much, but neither is particularly effective at blocking the B/P plosives.
So I used to recommend this $10 Dual Screen Pop Filter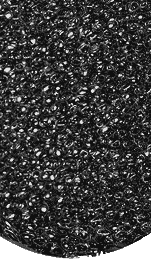 but the Rycote InVision Pop Filter Foam is an ABS nylon-blend plastic that has negligible HF roll‑off (0.25dB at 20kHz), 20dB attenuation of pops & thumps, and doesn't ring or resonate. Buy it in a pre-built filter here, or just buy the foam itself inexpensively and easily attach it in front of your mic with a clip or $6 Gooseneck (alternative 1), or disassemble this under $6 pop filter for the gooseneck+clamp, or even use this $4.60 suction cup model) or wrap it around your mic with a rubber band.
Musician's Gear Heavy-Duty Folding Music/Copy Stand ($20). However, there are many successful ways of building your own copy stand. Too tall for regular stands? I replaced the main adjustment pole in this $33 stand with a dowel, and now it goes much higher. (Use this .99 spring clamp to adjust the dowel instead of the default rotating mechanism that comes with the stand.)
Musician's Gear Tripod Mic Stand with Telescoping Boom Black ($26) or consider attaching this $12 Microphone Suspension Boom Scissor Arm Stand to your copy stand's vertical post instead of having a separate mic stand.
20-Foot XLR Microphone Cable, Low Z ($6.14) Good to keep a spare XLR cable around.
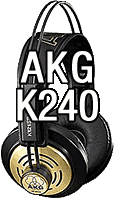 Headphones: Start with whatever you have. Though you may not want to use headphones at all (more info) depending on your training. Closed back are good if you need a lot of volume (closed hides sound the mic could pick up) otherwise go with semi-open.
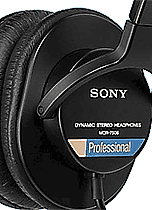
- Budget: Sennheiser HD 202 II Pro ($25)
- Semi-open: AKG K 240 ($72) "most beloved vocal monitor phones"
- Closed: Sennheiser HD 280 Pro ($75)
- Best (Why?) Closed: Sony MDR-7506 ($100)
Studio monitor. Why you might want one. What you should buy.
Your equipment total, assuming a $199 mic: $311.42
A Low-Budget Home Studio
Don't start with wedge foam.
A clothes closet with the mic coming from within hanging clothes, and comforters or moving blankets covering some areas is sufficient for many. Begin by finding and reducing or moving away from noise sources such as computer or furnace fans, fluorescent lights, ticking clocks, running water in building pipes, etc.
A Room Corner Studio in Just 90 Minutes for under $80!
 |
If a good clothes closet doesn't work for you, we've tested a DIY solution that we'll be adding photos and instructions to soon, but it's an almost completely tool-less, standalone unit that most people can set up in less than 90 minutes.
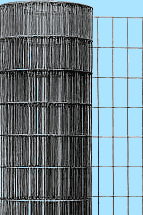
Uses materials in stock at Home Depot and similar hardware stores (e.g. acoustic insulation), but if you have 2x4's, old sheets, bungee cords or wire fencing already, you've already got some of what you need.
Test Your Studio for Noise:
 Once you have your initial studio set up, record silence repeatedly as you add sound deadening material: Hook everything up (but make sure any compression settings are off, such as on your mixer) and record the silence (only the ambient sound) of your studio and equipment for a few seconds. After recording, playback and watch the meter in your software or equipment (typically green/yellow/red) that shows decibels. You'll eventually want to get it down to -40 dB, preferably to -45 dB or less. This measurement is called the noise floor.
Install sound deadening material (see below) in your space and/or around your microphone and repeat the ambient recording until the noise floor is 40 dB or less. Clap your hands (or pop a balloon) to observe echoes on the waveform Record a script and carefully listen for echoes. Use more sound absorbing material until nearly all echoes are gone. Watch this video for tips.. You may also want to use George Whittam's free sound check service at vostudiotech.com to check your noise level.
What sound absorbing material should you use?
When buying any sound absorbing product, note that the higher the NRC rating, the more sound a product can absorb.
Around the microphone
If you need sound deadening, consider first creating a cone of acoustic foam around your mic (or a box of it, but that blocks your view of copy more) as the first step. One option is to thread coat hanger wire or similar carefully through the foam to manipulate it into a cone.
The copy stand
While you can pin your copy to hanging fabric or clothes, if you're using a copy stand, drill approximate 1" holes in it (or buy one that has holes) and cover with fleece, a carpet sample, or similar to block sound bouncing off it. If you will be making notes on your copy as you work, consider using something solid such as a piece of card stock under your copy.
The Best Bargains in Acoustic Insulation
Buying towels from a Goodwill or other used/charity store turn out to be one of the most inexpensive AND effective materials. Here's a video of some acoustic tests and how to add the towels into sound panels.

A folded towel at least four layers thick absorbs the most sound from all frequency ranges compared to many other inexpensive materials.
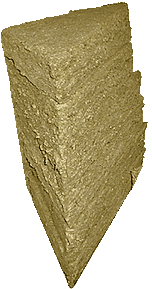 For spaces that need a lot of insulation, Roxul Safe 'n' Sound has effective sound absorption (pdf data sheet, NRC=1.05, FAQ) and is inexpensive (60 sq feet for under $45!), but, being compressible wool insulation, can be tricky to work with—keep it out of your eyes.
For variations of rigid insulation, Owens Corning 703/705, Roxul Con-Rock Board, EconoSorb panels, etc., visit this website or this one. They also offer frames you can mount your insulation in to make mobile panels. (Also see these DIY resources.)
Mount insulation thickly in corners as "bass traps" (low frequencies pool like water in corners–more info) and leave as large an air gap between the insulation and the wall as is practical.
Finally, before using wedge foam, consider quilted blanket material rolls or moving blankets (see also), or special sound blankets (e.g. Audimute 8' x 4.5' or Producer's Choice 8' x 6.7').
Bargain Wedge Foam
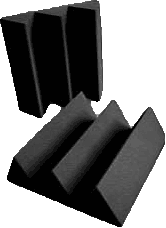 We have a large quantity of NRC=0.80 rated 4" wedge foam on hand just $2.50/square foot (pick up only). Here are the independent lab test results on the foam we're making available and this is where we buy it.
Four square feet from us is $10. It's $18.77 from ATS, and their minimum order is $56.32 after shipping. Or almost $77 for the equivalent amount of 2" Auralex! ($230 for a 2" Auralex 12pk). Yes, it's thin, but very expensive!
|
Also, see other acoustic insulation worth knowing about.
One way to get started in Audio books:
When you're ready, go here and register as a narrator in the ACX marketplace. Then study tech tips for ACX talent in this YouTube Video.
Notice: We will be moving to our new
name and
website in 2015 at the School of Acting and Voice Over


